Windows Version: Windows Server 2008 R2, Windows Server 2008, Windows 7/Vista
By default, the latest versions of Windows protects your computer with the Windows Firewall with Advanced Security, effectively blocking access to your computer from the internet and would-be hackers (Getting Started Guide).
However, this also prevents ftp-clients from accessing your installation of BulletProof FTP Server 2011 unless you “open the firewall” to allow access. This means, you must open at least two ports; one for the control-connect and 1 (one) data-port for every concurrent connection to the ftp-server.
NOTE: It’s very common for people to think that only 1 (ONE) port is needed for FTP (default tcp/ip port 21). However, this is NOT the case as you need to define data-ports in order to support Passive-Mode (PASV).
Configuring the Windows Firewall and BPFTP Server 2011 is very simple, but it takes a few steps. Below, we’ve broken down the process:
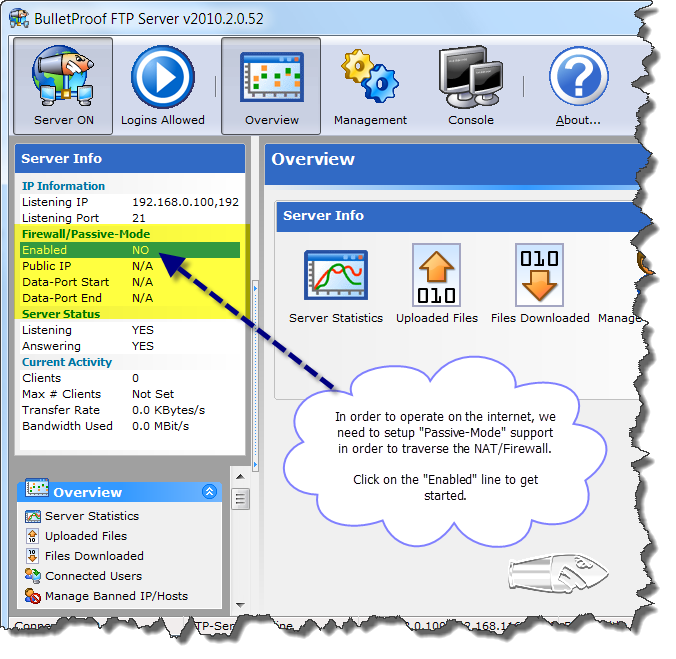
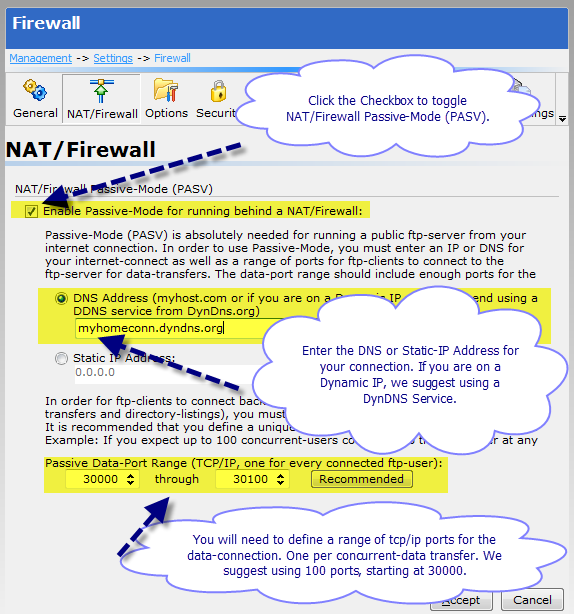
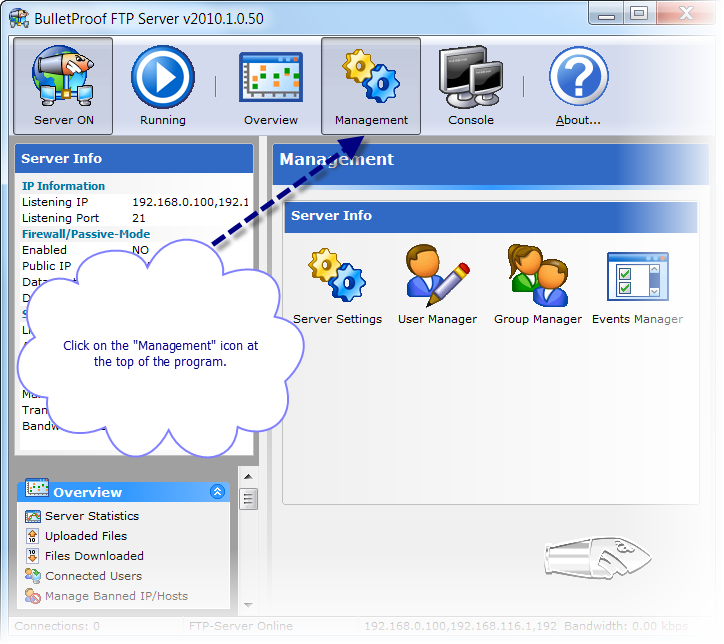
1) Configure BPFTP Server 2011 for NAT/Firewall and Passive-Mode (PASV)
2) Open the Windows Firewall up for the BPFTP Server 2011
3) Open the Windows Firewall up for the Control-Connection
4) Open the Windows Firewall up for the Data-Ports (Passive-Mode aka PASV)
5) Completed Entries in Windows Firewall
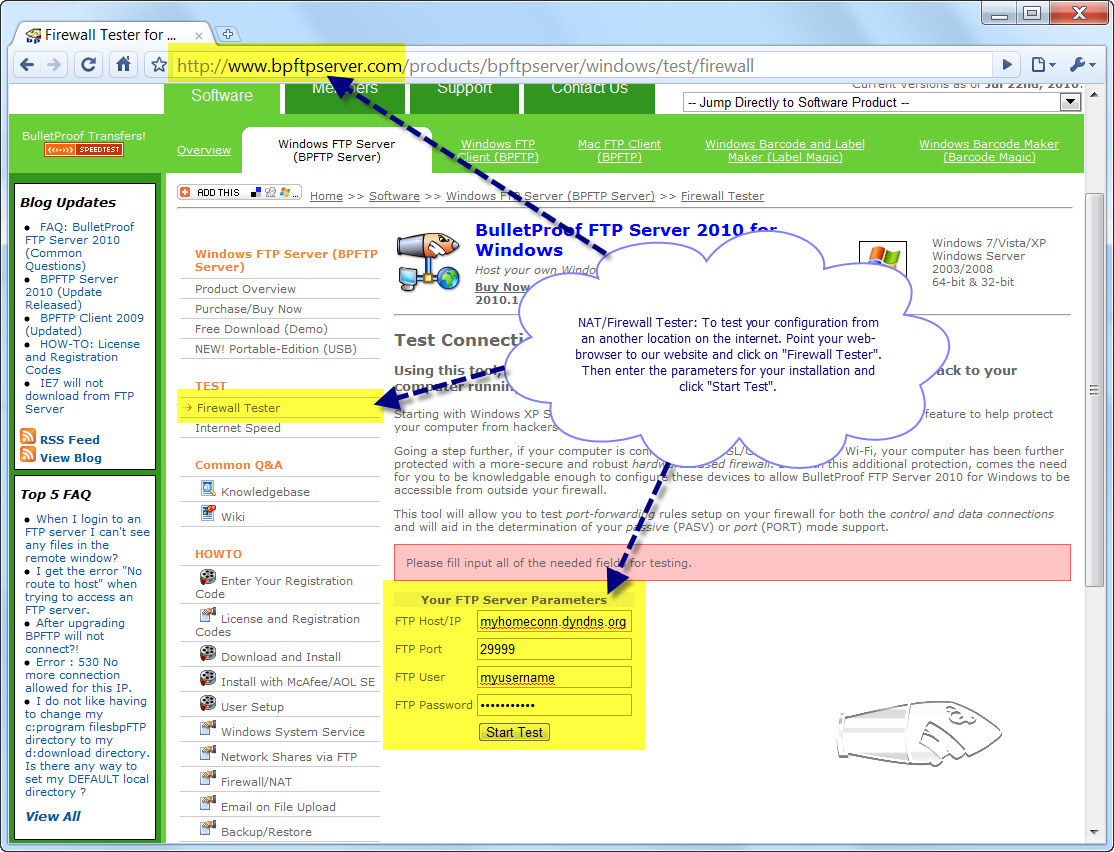
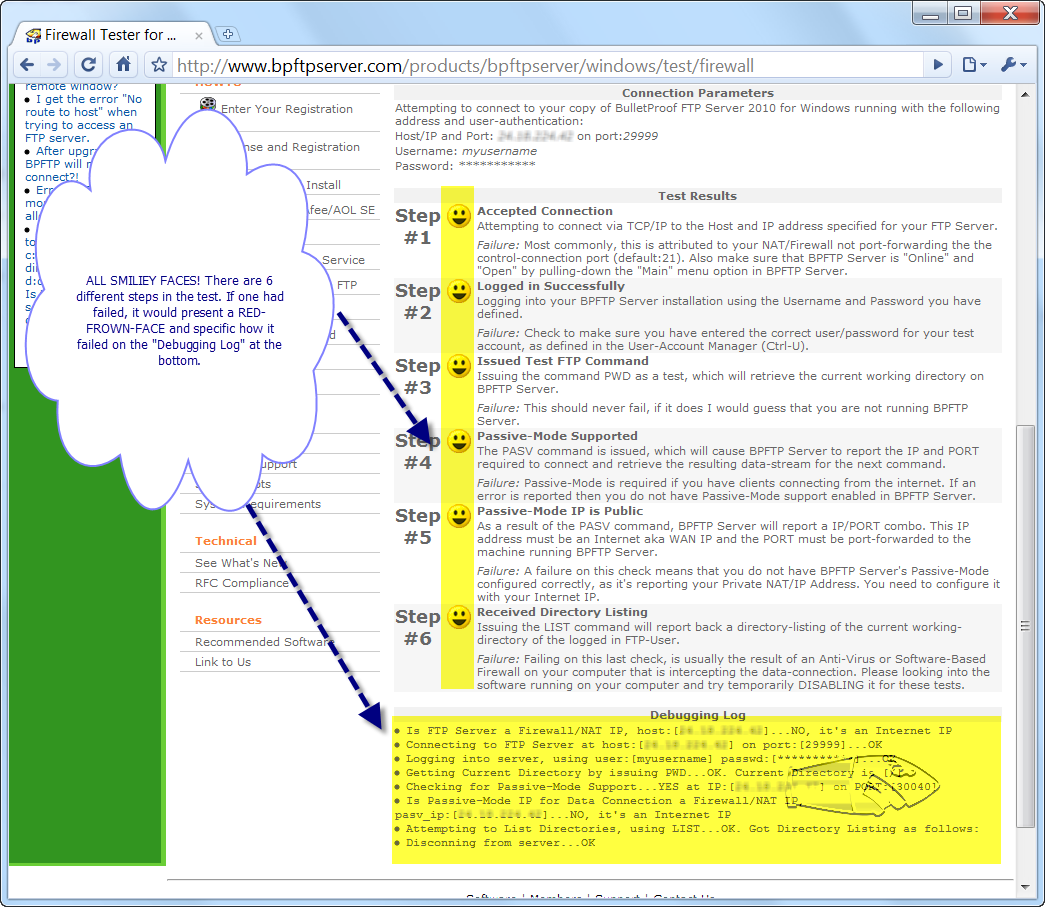
LASTLY: Be sure to run your installation through our Firewall Tester. After providing the IP/Host, Port, User and Password for your installation, this tester will simulate a ftp-user can connect to your BPFTP Server. Please use it!
http://bpftpserver.com/products/bpftpserver/windows/test/firewall
NOTE: If you are running any Anti-Virus or Internet-Security software on your computer (McAfee, Norton, etc) you may also be protected by yet-another-software-based-firewall. Please consult the documentation that came with your software for opening up firewall-ports.
NOTE: Almost everyone has a hardware-based NAT/Firewall router in their network topology. For Home Users, this is usually your WiFi-Router. Please look into the documentation that came with your hard-based NAT/Firewall router for information on opening firewall-ports.
Step-by-Step Directions


Back to Top
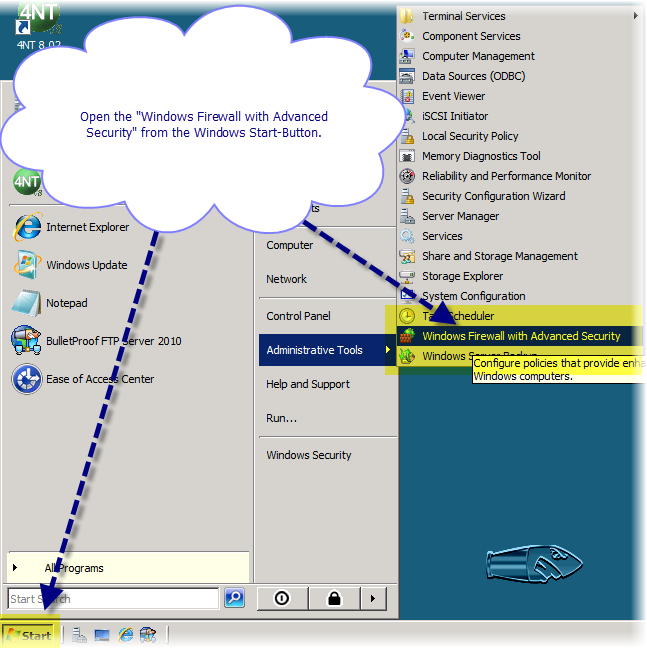
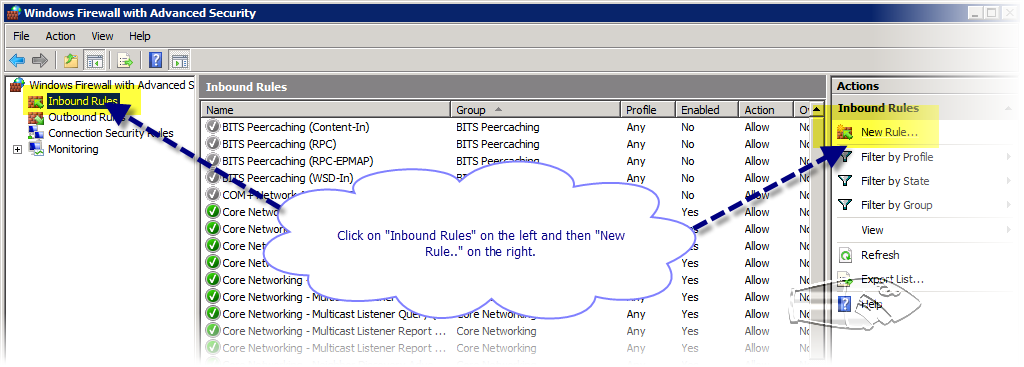
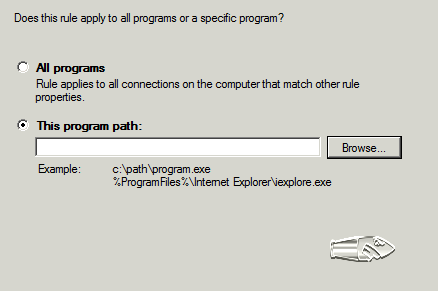
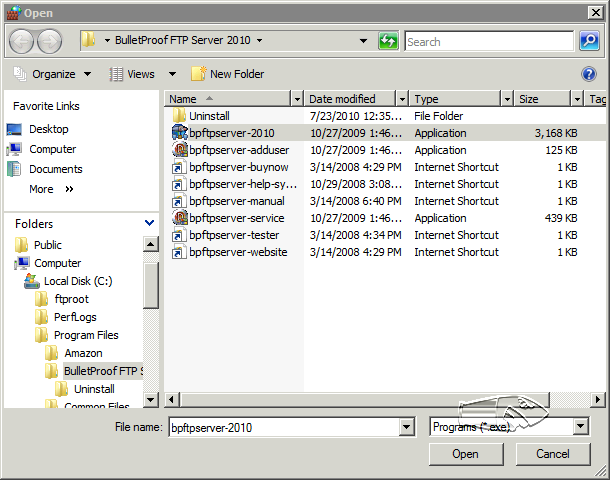
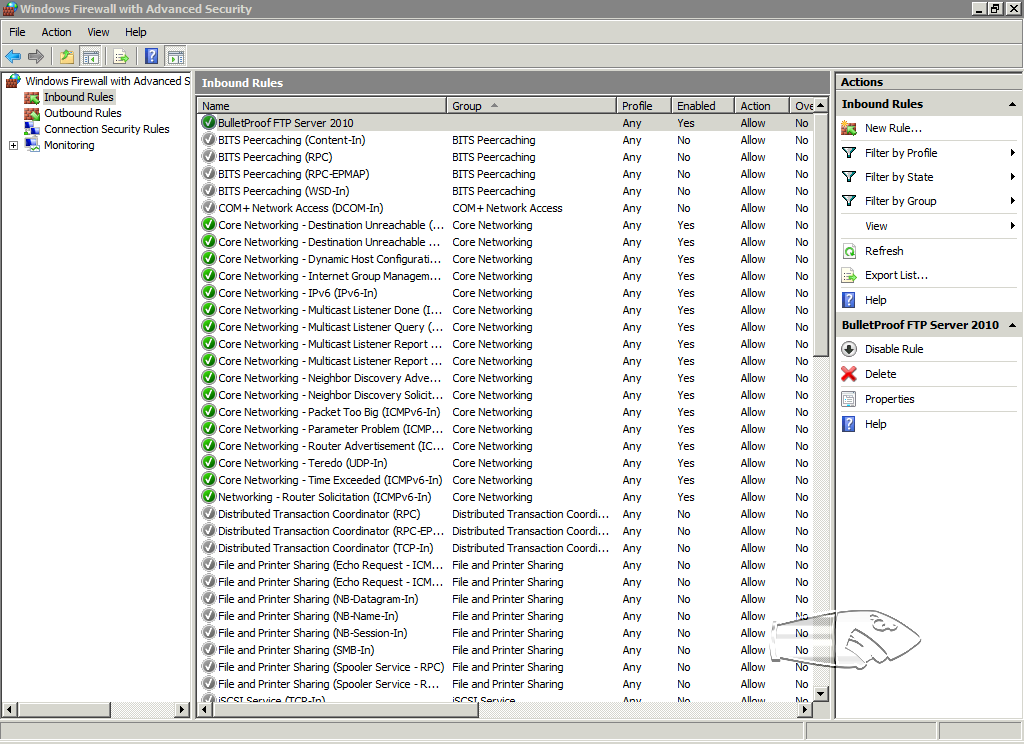
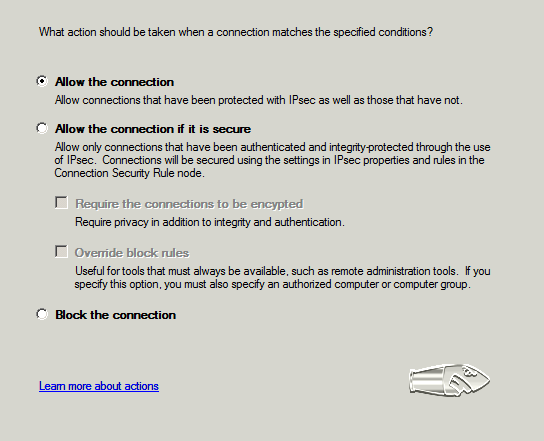
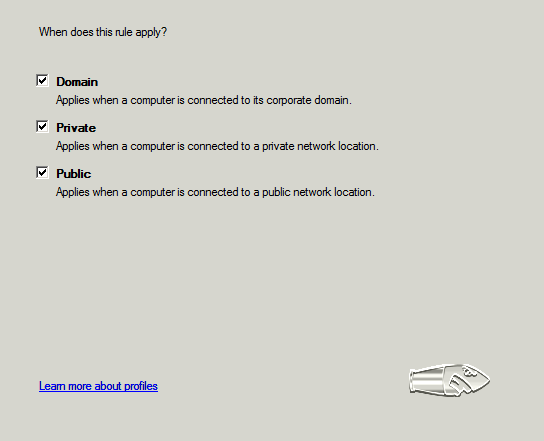
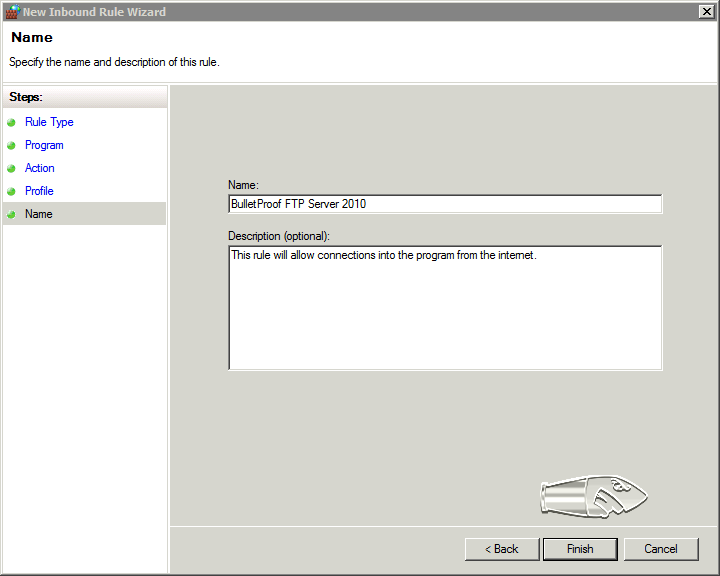
2) Open the Windows Firewall up for the BPFTP Server 2011


Back to Top
3) Open the Windows Firewall up for the Control-Connection


Back to Top
4) Open the Windows Firewall up for the Data-Ports (Passive-Mode aka PASV)


Back to Top
5) Completed Entries in Windows Firewall

Back to Top