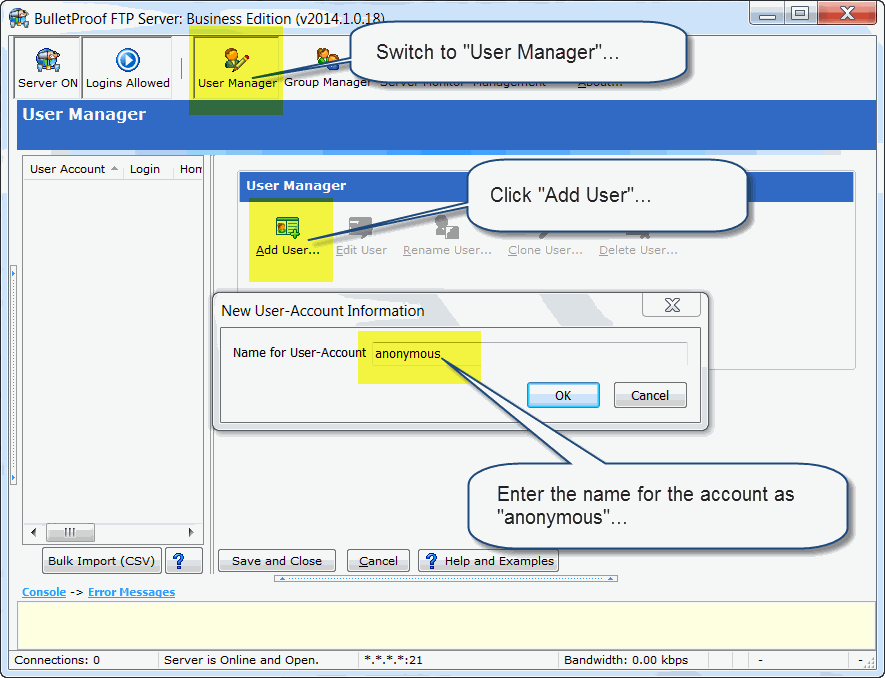
![1) Switch to "User Manager" 2) Click "Add User" 3) Enter the name for the account as "anonymous"](http://blog.builtbp.com/wp-content/uploads/2014/07/bsp-howto-anonymous-step1of5.gif)
2) Click “Add User”
3) Enter the name for the account as “anonymous”
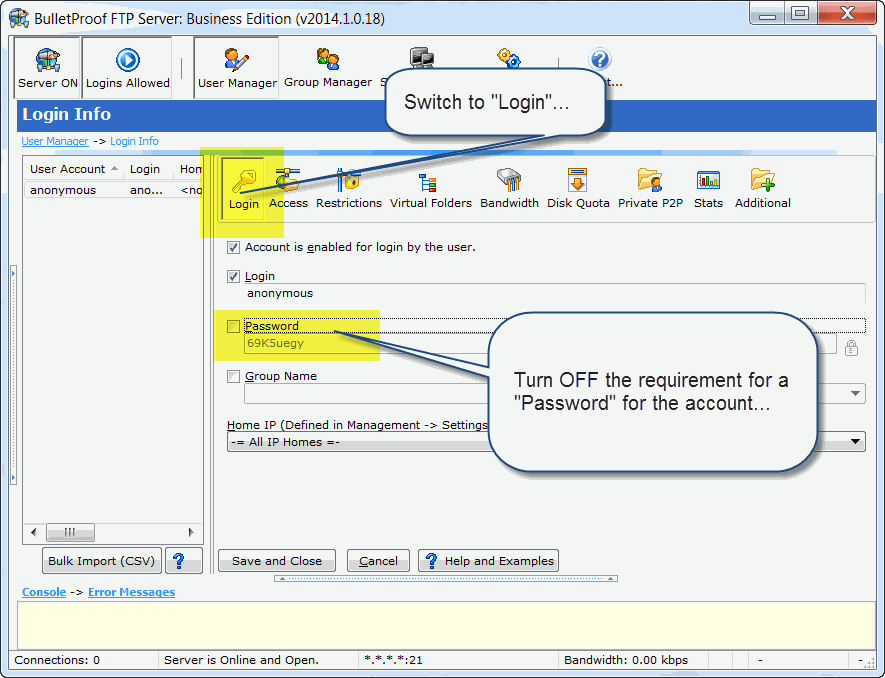
![1) Switch to "Login" 2) Turn OFF the requirement for a "Password" for the account...](http://blog.builtbp.com/wp-content/uploads/2014/07/bsp-howto-anonymous-step2of5.gif)
2) Turn OFF the requirement for a “Password” for the account…
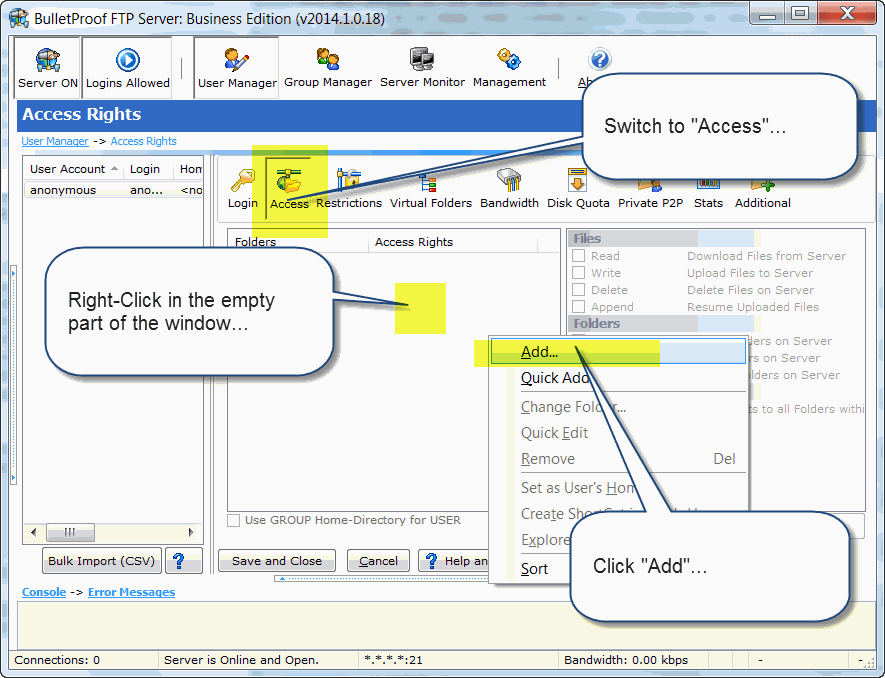
![1) Switch to "Access" 2) Right-Click in the empty part of the window. 3) Click Add.](http://blog.builtbp.com/wp-content/uploads/2014/07/bsp-howto-anonymous-step3of5.gif)
2) Right-Click in the empty part of the window.
3) Click Add.
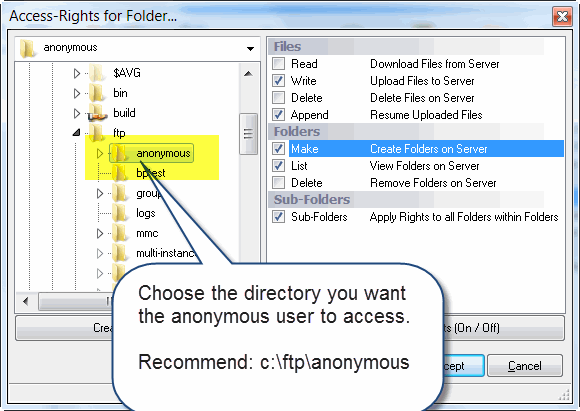
![1) Choose the directory you want the anonymous user to access. Recommend: c:\ftp\anonymous](http://blog.builtbp.com/wp-content/uploads/2014/07/bsp-howto-anonymous-step4of5.gif)
Recommend: c:\ftp\anonymous
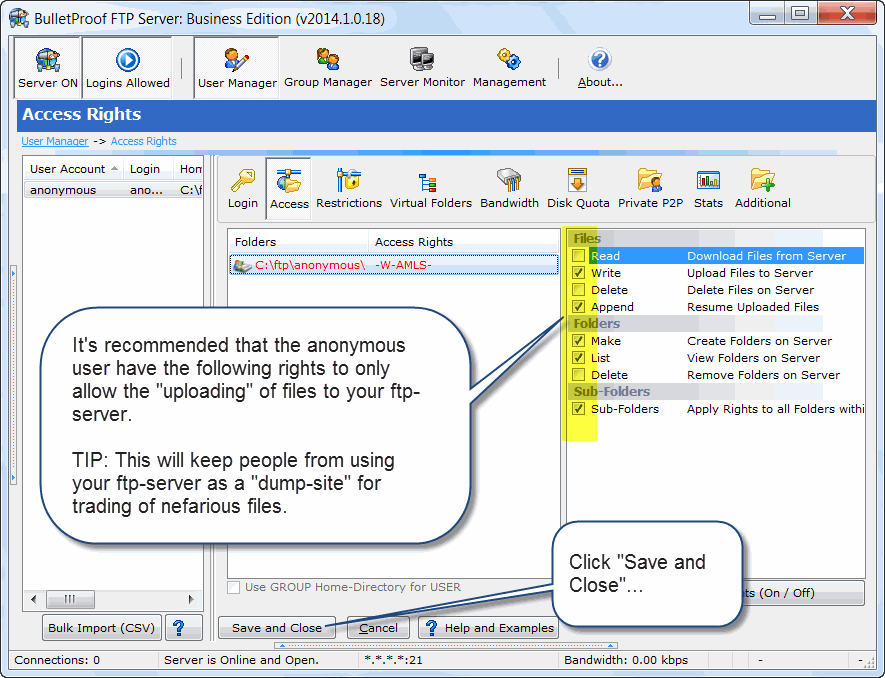
![1) It's recommended that the anonymous user have the following rights to only allow the "uploading" of files to your ftp-server. TIP: This will keep people from using your ftp-server as a "dump-site" for trading of nefarious files. 2) Click "Save and Close"](http://blog.builtbp.com/wp-content/uploads/2014/07/bsp-howto-anonymous-step5of5.gif)
TIP: This will keep people from using your ftp-server as a “dump-site” for trading of nefarious files.
2) Click “Save and Close”