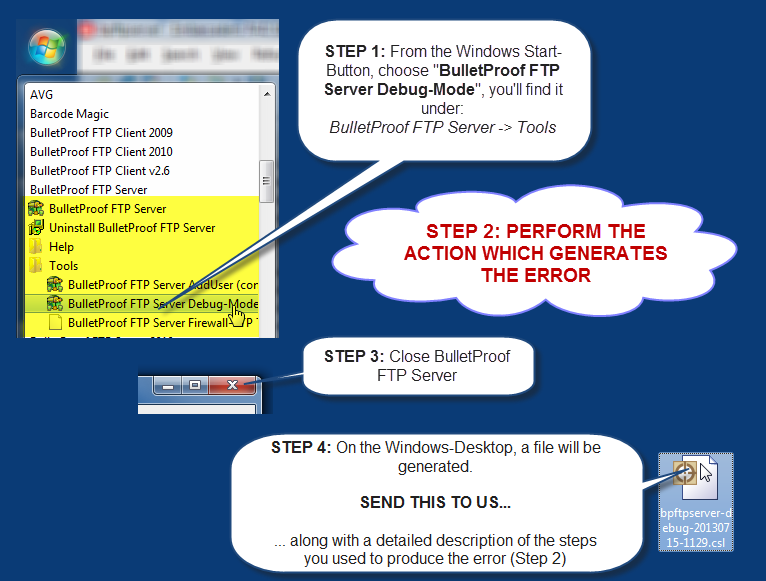
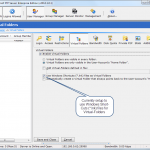
HOWTO: Enable Debug-Mode
Windows FTP Server with SFTP and FTPS

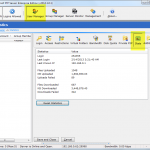
Whenever there’s a new version available, BPFTP Server will display “Update Available (CLICK HERE)” in a yellow-box at the top of “Server Info”.
However, in versions prior to and including 2013.1.0.5, this function was inadvertently broken; as a result, please go to our website to download the update. This functionality is restored and working in 2013.1.0.6 and later.
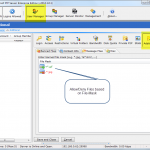
In the latest release of BulletProof FTP Server, we’ve added the ability to import users via the “Bulk Import (CSV)” button, located in the User Manager. A CSV-File is a flat-text-file that contains a list of records (one per row) with a defined set of field-values for that record. This is analogous to a spreadsheet, such as Microsoft Excel and is often used as a method of getting data in/out of a spreadsheet.
To this end, we’ve developed a function that allows you to IMPORT user-accounts from another source, using a CSV file. Below is a list of fields that are supported for import. In this list, the first record you see is “ACCOUNTNAME”, this is a MANDATORY record as it is the unique-primary-key for the data. If ACCOUNTNAME exists, the data will be updated. If not, a new user-account will be created and all of the data will be set to the provided information. All other fields are optional, but each row in the CSV-file must contain the same fields as defined in the first header-record.
NOTE: Executing this functionality can be automated from the command-line utility “bpftpserver-adduser.exe”. Please see this HOWTO for more information.
EXAMPLE:
In the following example, we are defining a CSV file to import 11 new user-accounts (mmc000 to mmc010). Below you will find the first row contains the list of columns each row/record will contain; subsequent rows contain the data for the accounts. Please note, this is generic data and in this case, I choose to make a simple list of account-names that are prefixed with “mmc” and then use a 3-digit number. The intention is to show the power and flexibility; as each user-account can be assigned their own home-directory (c:\ftp\mmc999), groups, login-name, passwords, etc.
"AccountName","ACCESSRIGHTS_PACKED","Enabled","EnableLogin","Login","EnablePass","Pass","GroupName"

"mmc000","C:\ftp\mmc000;RWDAMLSK","1","1","mmc000","1","mmc000","mmc-group-0"

"mmc001","C:\ftp\mmc001;RWDAMLSK","1","1","mmc001","1","mmc001","mmc-group-0"

"mmc002","C:\ftp\mmc002;RWDAMLSK","1","1","mmc002","1","mmc002","mmc-group-0"

"mmc003","C:\ftp\mmc003;RWDAMLSK","1","1","mmc003","1","mmc003","mmc-group-0"

"mmc004","C:\ftp\mmc004;RWDAMLSK","1","1","mmc004","1","mmc004","mmc-group-0"

"mmc005","C:\ftp\mmc005;RWDAMLSK","1","1","mmc005","1","mmc005","mmc-group-0"

"mmc006","C:\ftp\mmc006;RWDAMLSK","1","1","mmc006","1","mmc006","mmc-group-0"

"mmc007","C:\ftp\mmc007;RWDAMLSK","1","1","mmc007","1","mmc007","mmc-group-0"

"mmc008","C:\ftp\mmc008;RWDAMLSK","1","1","mmc008","1","mmc008","mmc-group-0"

"mmc009","C:\ftp\mmc009;RWDAMLSK","1","1","mmc009","1","mmc009","mmc-group-0"

"mmc010","C:\ftp\mmc010;RWDAMLSK","1","1","mmc010","1","mmc010","mmc-group-0"
SUPPORTED FIELDS AVAILABLE TO BULK-IMPORT
Commonly Used Fields
| FIELD_NAME | FIELD_TYPE | DEFAULT | MANDATORY |
| ACCOUNTNAME | STRING | “” | TRUE |
| AccessRights_Packed | STRING | “” | |
| Enabled | BOOLEAN | True | |
| EnableLogin | BOOLEAN | True | |
| Login | STRING | “” | |
| EnablePass | BOOLEAN | True | |
| Pass | STRING | “” | |
| EnableGroup | BOOLEAN | False | |
| GroupName | STRING | “” | |
| UseGroupHomeDir | BOOLEAN | False |
Lesser Lesser Used Fields
| FIELD_NAME | FIELD_TYPE | DEFAULT | MANDATORY |
| AddHomeLink | BOOLEAN | False | |
| AddLinkFromFile | BOOLEAN | False | |
| AddLinks | BOOLEAN | False | |
| AllowChangePassword | BOOLEAN | False | |
| AllowNoop | BOOLEAN | True | |
| BannedFiles_PACKED | STRING | “” | |
| By-Pass_MaxUser | BOOLEAN | False | |
| ChgDirMsgFile | STRING | “” | |
| DefaultGroupQuotaCredit | INTEGER | -1 | |
| DefaultGroupRatioCredit | INTEGER | -1 | |
| EnableMaxConPerIP | BOOLEAN | False | |
| EnableMaxUsers | BOOLEAN | False | |
| EnableSITECHAT | BOOLEAN | False | |
| EnableSITEWHO | BOOLEAN | False | |
| Hide hidden Files | BOOLEAN | False | |
| Home-IP | STRING | “” | |
| IPACLList_PACKED | STRING | “” | |
| Info_Address | STRING | “” | |
| Info_City | STRING | “” | |
| Info_Email | STRING | “” | |
| Info_Fax | STRING | “” | |
| Info_Name | STRING | “” | |
| Info_Notes | STRING | “” | |
| Info_PhoneHome | STRING | “” | |
| Info_PhoneWork | STRING | “” | |
| LinksFile | STRING | “” | |
| LoginMsgFile | STRING | “” | |
| MaxConPerIP | INTEGER | 1 | |
| MaxSpeedEnabled | BOOLEAN | False | |
| MaxSpeedRcv | INTEGER | 512 | |
| MaxSpeedSnd | INTEGER | 512 | |
| MaxUsers | INTEGER | 0 | |
| QuotaCurrent | INTEGER | 0 | |
| QuotaEnabled | BOOLEAN | False | |
| QuotaMax | INTEGER | 0 | |
| RatioCredit | INTEGER | 0 | |
| RatioDown | INTEGER | 1 | |
| RatioEnabled | BOOLEAN | False | |
| RatioMethod | INTEGER | 0 | |
| RatioUp | INTEGER | 1 | |
| RelativePath | BOOLEAN | False | |
| ResolveLNK | BOOLEAN | True | |
| ShowChangeDirMsg | BOOLEAN | False | |
| ShowLoginMsg | BOOLEAN | False | |
| TimeOutEnabled | BOOLEAN | True | |
| Timeout | INTEGER | 600 | |
| TreatLinksAs | BOOLEAN | True |
How to Remove License-Code
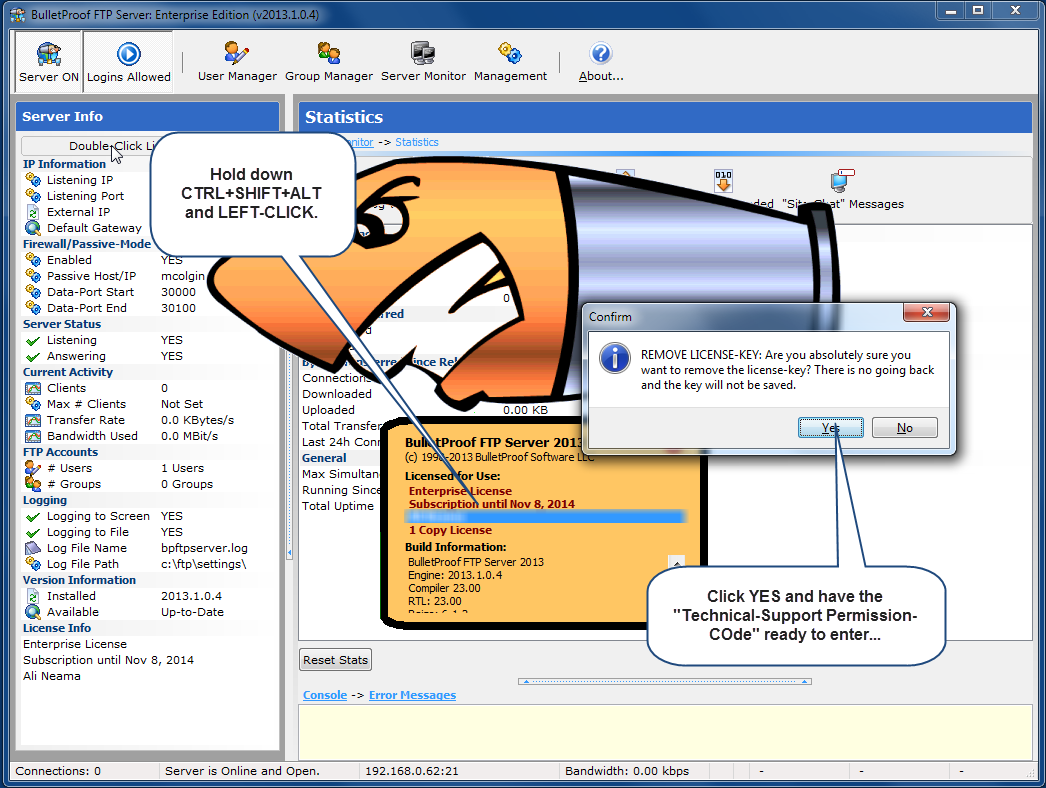
902djlx0qojsLicense-Codes: This HOWTO covers the entering the subscription-codes into the software. In addition, we have two other HOWTOs which may help…
HOWTO: Upgrade Your License to a new Edition
http://blog.builtbp.com/2014/02/upgrade-your-license-to-a-new-edition/
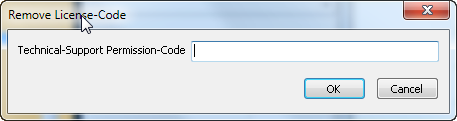
HOWTO: Remove License-Code for Upgrading License
http://blog.builtbp.com/2013/05/howto-remove-license-code-for-upgrading-license/
HOWTO: Enter Your Subscription Code…
Once you have purchased BulletProof FTP Server (http://bpftpserver.com), you will receive a “Subscription Code” in an email with your receipt. Once this information has been entered into the TRIAL/DEMO version of the software, installed on your computer; it will turn itself into the full-featured-retail-copy.

The current version of BulletProof Server supports all modern flavors of Windows Server; including:
Windows Server 2016 (All Releases/Service Packs)
Windows Server 2012 Essentials
Windows Server 2012 Standard
Windows Server 2012 Datacenter
Windows Server 2012 (All Releases/Service Packs)
Windows Server 2012 Foundation
Windows Server 2012 Essentials
Windows Server 2012 Standard
Windows Server 2012 Datacenter
Windows Server 2008 (All Releases/Service Packs)
Windows Server 2008 Standard
Windows Server 2008 Enterprise
Windows Server 2008 Datacenter
Windows HPC Server 2008
Windows Web Server 2008
Windows Storage Server 2008
Windows Small Business Server 2008
Windows Essential Business Server 2008
Windows Server 2008 Foundation (Codenamed “Lima”)
Windows Server 2003 (All Releases/Service Packs)
Windows 2003 Web
Windows 2003 Standard
Windows 2003 Enterprise
Windows 2003 Datacenter
Windows 2003 Compute Cluster
Windows 2003 Storage Server
Windows Home Server (All Releases/Service Packs)
Windows Home Server 2011
Windows Home Server
The current version of BulletProof Server supports all modern flavors of Windows Desktop OS; including:
Windows 10
Windows 8
Windows 7
Windows VISTA
Windows XP
The User Manager in BulletProof Server contains an extensive number of controls and features. For more information on each sub-function in the User-Manager, please click a following slide…

New Release: BulletProof FTP Server 2011
Today, we are proud to announce a new release of our BulletProof FTP Server for Windows.
We’ve looked at every bit of functionality in our previous award-winning version and rewritten it to be better, faster and more intuitive. We are very pleased with it and hope you will be too!
We’ve also done our very best, to make sure this version is a simple upgrade to your previous version; by maintaining the same settings, users/groups and data-formats. In addition, we’ve built an automatic migration utility that will aid in the upgrade to the latest version.
Demo Version (Free 15-Day Trial)
http://bpftpserver.com/products/bpftpserver/windows/download
Product Information
http://bpftpserver.com
Purchasing Information
http://bpftpserver.com/products/bpftpserver/windows/buynow
Previous Customers
Join us on Facebook
http://www.facebook.com/pages/Bpftp/17713238532
Follow us on Twitter
https://twitter.com/bpftp
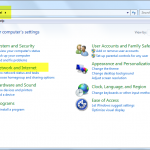
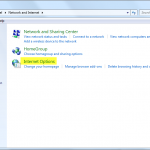
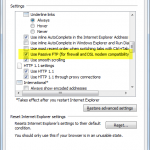
Configuring Internet Explorer to be able to connect to BulletProof FTP Server (or any FTP Server) is very easy to do and requires the toggling of two (2) options from:
Windows Start Button -> Control Panel -> Network & Internet -> Internet Options, click the “Advanced” tab and check “Enable FTP Folder” and “Use Passive FTP”.
Below are screen-shots for accessing these features in Windows. Please click the small-image to view the full-image.