Windows FTP Server with SFTP and FTPS
Below is a list of HOWTO articles that have been written over the years to help customers in getting up and running with BulletProof FTP Server.
Note: Some of the screen-shots show older versions of the software. The UI hasn’t changed much between different versions, but you might find some of the buttons labeled differently than what appears.
HOWTO: Downloading BPFTP Server 2010
http://blog.builtbp.com/2010/09/howto-downloading-bpftp-server-2010/
HOWTO: Installing BPFTP Server 2010
http://blog.builtbp.com/2010/09/howto-installing-bpftp-server-2010/
HOWTO: Adding a User
http://blog.builtbp.com/2010/09/howto-adding-a-user/
It’s VERY common that people think only one-port is needed for ftp (default: tcp/ip 21). However, this is not true.
FTP requires at least two ports, one for the control-port (used to login and issue commands, default tcp/ip 21) and a data-port (default tcp/ip 30000 to 30100). One data-port is needed for every concurrent data-connection, for this reason we suggest using a range of 100 ports which will handle most needs.
HOWTO: Windows Firewall and BPFTP Server 2011
http://blog.builtbp.com/2011/06/windows-firewall-and-bulletproof-ftp-server/
HOWTO: Windows Firewall
http://blog.builtbp.com/2010/09/howto-windows-firewall/
HOWTO: Setting up NAT/Passive/Firewall Support
http://blog.builtbp.com/2010/09/howto-setting-up-natpassivefirewall-support/
HOWTO: Enter Your Subscription-Code
http://blog.builtbp.com/2013/05/howto-enter-your-subscription-code/
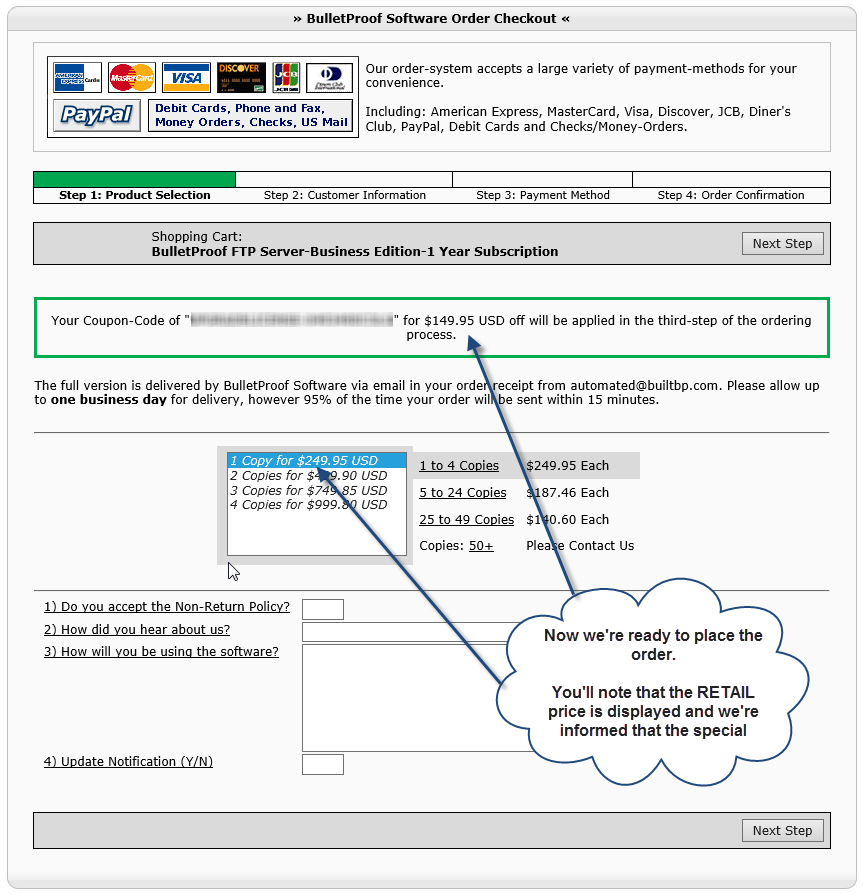
HOWTO: Purchase an Upgrade to your License
http://blog.builtbp.com/2014/02/howto-purchase-an-upgrade-to-your-license/
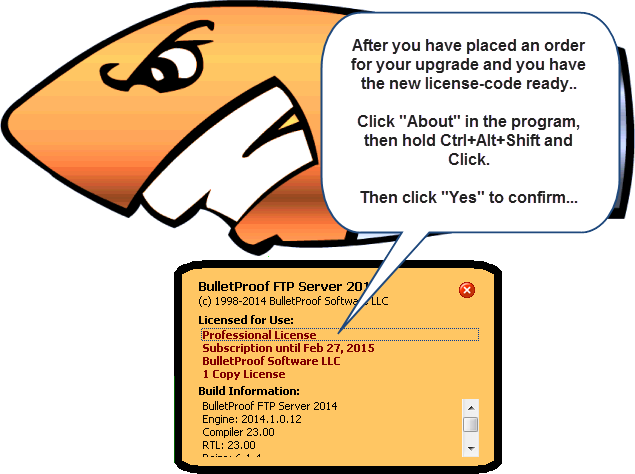
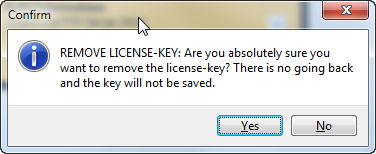
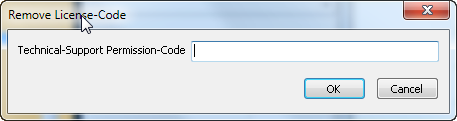
HOWTO: Remove Your License-Code
http://blog.builtbp.com/2013/05/howto-remove-your-license-code/
FAQ: Can I Upgrade and retain all my Users, Groups and Settings?
http://blog.builtbp.com/2011/12/faq-can-i-upgrade-and-retail-all-my-users-groups-and-settings/
FAQ: Where does BPFTP Server store the Users, Groups and Settings?
http://blog.builtbp.com/2011/12/faq-where-does-bpftp-server-store-the-users-groups-and-settings/
HOWTO: Overridding the Storage-Path for Settings, Users and Groups
http://blog.builtbp.com/2011/10/howto-override-storage-path-for-settings-users-and-groups/
HOWTO: Windows System-Service
http://blog.builtbp.com/2011/09/howto-windows-system-service/
| Variable | Description | Scope | Context | Units/Example |
|---|---|---|---|---|
| %BDOWN | Data Transferred by FTP-Account | Current Session | Download | Bytes |
| %BDOWNALL | Data Transferred by FTP-Account | All Sessions | Download | Bytes |
| %BTOT | Data Transferred by FTP-Account | All Sessions | Up/Down | Bytes |
| %BUP | Data Transferred by FTP-Account | Current Session | Upload | Bytes |
| %BUPALL | Data Transferred by FTP-Account | All Sessions | Upload | Bytes |
| %C24H | Number of Connections by FTP-Account | Current Session | 24 Hours | integer-value |
| %CALL | Number of Connections by FTP-Account | Current Session | Forever | integer-value |
| %CLIENTGROUP | Group Account | Current Session | User Manager -> Login -> Group Name | agroupname |
| %CLIENTIP | IP Address | Current Session | Obtained from Network | 192.168.0.1 |
| %CLIENTIP_000 | IP Address (Zero Padded) | Current Session | Obtained from Network | 192.168.000.001 |
| %CLIENTLOGIN | Username used to Login | Current Session | User Manager -> Login -> Group Name | ausername |
| %CLIENTNAME | Account-Name | Current Session | User Manager -> Login -> Group Name | aaccountname |
| %CLIENTPASSWORD | Password used to Login | Current Session | User Manager -> Login -> Group Name | apassword |
| %CNOW | Number of Connections by FTP-Account | Current Session | Current | integer-value |
| %DATE | Current Date | System | Obtained from OS | Locale-Specific |
| %DATE_EX | Current Date | System | Obtained from OS | mmddyyyy |
| %DATE_EX_DMY | Current Date | System | Obtained from OS | dd-mm-yyyy |
| %DATE_EX_MDY | Current Date | System | Obtained from OS | mm-dd-yyyy |
| %DATE_EX_YMD | Current Date | System | Obtained from OS | yyyy-mm-dd |
| %DFREE | Diskspace Free | Current Session | Current Working Directory | Bytes |
| %DFREEGB | Diskspace Free | Current Session | Current Working Directory | GiBytes |
| %DFREEKB | Diskspace Free | Current Session | Current Working Directory | KiBytes |
| %DFREEMB | Diskspace Free | Current Session | Current Working Directory | MiBytes |
| %DIR_8.3 | Directory Name of Target FTP Command | Current Sessions | N/A | string (FAT32 shortened) |
| %DIRCREATED | Created Directory Name | Current Sessions | N/A | string |
| %DIRDELETED | Deleted Directory Name | Current Sessions | N/A | string |
| %DIRFULLNAME | Directory Name of Target FTP Command | Current Sessions | N/A | string |
| %DIRTARGET | Directory Name of Target FTP Command | Current Sessions | N/A | string |
| %DIRTARGET_8.3 | Directory Name of Target FTP Command | Current Sessions | N/A | string (FAT32 shortened) |
| %DISK | Drive Letter | Current Session | Current Working Directory | C (Single-Char, ex: C:\ drive) |
| %FDOWN | Number of Files Transferred | Current Session | Downloaded | integer |
| %FDOWNALL | Number of Files Transferred | All Sessions | Downloaded | integer |
| %FILEDATE | File Creation Date | Current Sessions | Up/Down | Locale Specific |
| %FILEDATE_EX | File Creation Date | Current Sessions | Up/Down | mmddyyyy |
| %FILEDATE_EX_DMY | File Creation Date | Current Sessions | Up/Down | dd-mm-yyyy |
| %FILEDATE_EX_MDY | File Creation Date | Current Sessions | Up/Down | mm-dd-yyyy |
| %FILEDATE_EX_YMD | File Creation Date | Current Sessions | Up/Down | yyyy-mm-dd |
| %FILEDIR | Directory Only | Current Session | Up/Down/Commands | string (No Trailing Backslash) |
| %FILEEXT | Extension Only | Current Session | Up/Down/Commands | string |
| %FILEFULLNAME | Fully Qualified Filename | Current Session | Up/Down/Commands | string (includes leading ".") |
| %FILENAME | Filename Only | Current Session | Up/Down/Commands | string |
| %FILENAME_8.3 | Filename Only (FAT32) | Current Session | Up/Down/Commands | string |
| %FILENOEXT | Filename without Extension | Current Session | Up/Down/Commands | string |
| %FILEPATH | Directory Only | Current Session | Up/Down/Commands | string (Incl Trailing Slash) |
| %FILEPATH_8.3 | Directory Only (FAT32) | Current Session | Up/Down/Commands | string |
| %FILESIZE | Size of File | Current Session | Up/Down/Commands | Bytes |
| %FILETIME | File Creation Time | Current Sessions | Up/Down | Locale Specific |
| %FILETIME_24H | File Creation Time | Current Sessions | Up/Down | hh:mm:ss |
| %FILETIME_EX | File Creation Time | Current Sessions | Up/Down | hhmmss |
| %FTOT | Number of Files Transferred | All Sessions | Up/Down | integer |
| %FTOTALL | Number of Files Transferred | All Sessions | Up/Down | integer |
| %FUP | Number of Files Transferred | Current Session | Uploaded | integer |
| %FUPALL | Number of Files Transferred | All Sessions | Uploaded | integer |
| %GBDOWN | Data Transferred by FTP-Account | Current Session | Download | GiBytes |
| %GBDOWNALL | Data Transferred by FTP-Account | All Sessions | Download | GiBytes |
| %GBTOT | Data Transferred by FTP-Account | All Sessions | Up/Down | GiBytes |
| %GBUP | Data Transferred by FTP-Account | Current Session | Upload | GiBytes |
| %GBUPALL | Data Transferred by FTP-Account | All Sessions | Upload | GiBytes |
| %KBDOWN | Data Transferred by FTP-Account | Current Session | Download | KiBytes |
| %KBDOWNALL | Data Transferred by FTP-Account | All Sessions | Download | KiBytes |
| %KBTOT | Data Transferred by FTP-Account | All Sessions | Up/Down | KiBytes |
| %KBUP | Data Transferred by FTP-Account | Current Session | Upload | KiBytes |
| %KBUPALL | Data Transferred by FTP-Account | All Sessions | Upload | KiBytes |
| %LOCALIP | IP Address | System | Obtained from Network | string |
| %LOGFILE | Current Log-File | Software Settings | Management -> Logging -> Log Settings | string |
| %LOGFILEOLD | Previous Log-File | Software Settings | Obtained from Software | string |
| %MAXUSERS | Max Number of FTP-Clients | Software Settings | Management -> Settings -> General | integer |
| %MBDOWN | Data Transferred by FTP-Account | Current Session | Download | MiBytes |
| %MBDOWNALL | Data Transferred by FTP-Account | All Sessions | Up/Down | MiBytes |
| %MBTOT | Data Transferred by FTP-Account | All Sessions | Up/Down | MiBytes |
| %MBUP | Data Transferred by FTP-Account | Current Session | Upload | MiBytes |
| %MBUPALL | Data Transferred by FTP-Account | All Sessions | Upload | MiBytes |
| %PCOSVER | OS Version | System | Obtained from OS | string |
| %PCPROC | CPU | System | Obtained from OS | string |
| %PCRAM | RAM | System | Obtained from OS | string |
| %S_IP | Server IP delimited by commas | System | Obtained from OS | string |
| %SERVERDATE | Current Date | System | Obtained from OS | Locale Specific |
| %SERVERDAYS | Uptime Days | Software State | Obtained from Software | integer |
| %SERVERGBALL | Data Transferred | Software Install Date | Up/Down | GiBytes |
| %SERVERGBDOWN | Data Transferred | Software Install Date | Downloaded | GiBytes |
| %SERVERGBUP | Data Transferred | Software Install Date | Uploaded | GiBytes |
| %SERVERHOURS | Uptime Hours | Software State | Obtained from Software | integer |
| %SERVERIP | IP Address | System | Obtained from OS | string |
| %SERVERKBALL | Data Transferred | Software Install Date | Up/Down | KiBytes |
| %SERVERKBDOWN | Data Transferred | Software Install Date | Downloaded | KiBytes |
| %SERVERKBUP | Data Transferred | Software Install Date | Uploaded | KiBytes |
| %SERVERLOCALHOST | Server Local-Hostname | System | Obtained from Network | string |
| %SERVERMBALL | Data Transferred | Software Install Date | Up/Down | MiBytes |
| %SERVERMBDOWN | Data Transferred | Software Install Date | Downloaded | MiBytes |
| %SERVERMBUP | Data Transferred | Software Install Date | Uploaded | MiBytes |
| %SERVERMINS | Uptime Minutes | Software State | Obtained from Software | integer |
| %SERVERSECS | Uptime Seconds | Software State | Obtained from Software | integer |
| %SERVERSPEED | Data Transferred | Software Install Date | Up/Down | Bytes/Sec |
| %SERVERSPEEDKB | Data Transferred | Software Install Date | Up/Down | KiBytes/Sec |
| %SERVERSPEEDMB | Data Transferred | Software Install Date | Up/Down | MiBytes/Sec |
| %SERVERTIME | Current Time | System | Obtained from OS | HH:MM:SS |
| %SERVERTIMEUP | Uptime Since Restart | Software State | Obtained from Software | 99days 23:59:59 |
| %SERVERTOTUPTIME | Total Uptime in Seconds | Software State | Obtained from Software | integer |
| %SERVERVERSION | Version of FTP-Server | Software State | About | string |
| %SESSIONAVG | Average number of files | Software Restart Date | Up/Down | integer |
| %SESSIONFILESALL | Files Transferred | Software Restart Date | Up/Down | integer |
| %SESSIONFILESDOWN | Files Transferred | Software Restart Date | Downloaded | integer |
| %SESSIONFILESUP | Files Transferred | Software Restart Date | Uploaded | integer |
| %SESSIONGBALL | Data Transferred | Software Restart Date | Up/Down | GiBytes |
| %SESSIONGBDOWN | Data Transferred | Software Restart Date | Downloaded | GiBytes |
| %SESSIONGBTOTAL | Data Transferred | Software Restart Date | All Data + Protocol Bytes | GiBytes |
| %SESSIONGBUP | Data Transferred | Software Restart Date | Uploaded | GiBytes |
| %SESSIONKBALL | Data Transferred | Software Restart Date | Up/Down | KiBytes |
| %SESSIONKBDOWN | Data Transferred | Software Restart Date | Downloaded | KiBytes |
| %SESSIONKBTOTAL | Data Transferred | Software Restart Date | All Data + Protocol Bytes | KiBytes |
| %SESSIONKBUP | Data Transferred | Software Restart Date | Uploaded | KiBytes |
| %SESSIONMBALL | Data Transferred | Software Restart Date | Up/Down | MiBytes |
| %SESSIONMBDOWN | Data Transferred | Software Restart Date | Downloaded | MiBytes |
| %SESSIONMBTOTAL | Data Transferred | Software Restart Date | All Data + Protocol Bytes | MiBytes |
| %SESSIONMBUP | Data Transferred | Software Restart Date | Uploaded | MiBytes |
| %SITEWHO | Listing of other online clients | Software State | Obtained from Software | string |
| %TIME | Current Time | System | Obtained from OS | HH:MM:SS |
| %TIME_24H | Current Time | System | Obtained from OS | HH:MM:SS |
| %TIME_EX | Current Time | System | Obtained from OS | HHMMSS |
| %TMIN | Minutes since connected | Current Session | Obtained from Software | integer |
| %TOPALL | Most Frequently Accessed Files | All Time | Management -> Settings -> Stat Generator | integer |
| %TOPDAY | Most Frequently Accessed Files | Day | Management -> Settings -> Stat Generator | integer |
| %TOPMONTH | Most Frequently Accessed Files | Month | Management -> Settings -> Stat Generator | integer |
| %TOPWEEK | Most Frequently Accessed Files | Week | Management -> Settings -> Stat Generator | integer |
| %TSEC | Seconds since connected | Current Session | Obtained from Software | integer |
| %UCURRENTDIR | Current Working Directory | Current Session | Current Working Directory | string |
| %UFILESPEED | Last Transfer Speed | Current Session | Obtained from Software | Bytes |
| %UFILESPEEDKB | Last Transfer Speed | Current Session | Obtained from Software | KiBytes |
| %UFILESPEEDMB | Last Transfer Speed | Current Session | Obtained from Software | MiBytes |
| %UHOME | User Home Directory | Current Session | Obtained from Software | string |
| %UHOSTNAME | Hostname of IP Address | Current Session | Obtained from Network | ahost.adomain.com |
| %UIADDRESS | User Account: Address | User Settings | User Manager -> Additional -> Contact Info | string |
| %UICITY | User Account: City | User Settings | User Manager -> Additional -> Contact Info | string |
| %UID | User Account: ID | User Settings | User Manager -> Additional -> Contact Info | string |
| %UIEMAIL | User Account: Email | User Settings | User Manager -> Additional -> Contact Info | string |
| %UIFAX | User Account: Fax | User Settings | User Manager -> Additional -> Contact Info | string |
| %UINAME | User Account: Name | User Settings | User Manager -> Additional -> Contact Info | string |
| %UINOTES | User Account: Notes | User Settings | User Manager -> Additional -> Contact Info | string |
| %UIP | IP Address (same as %CLIENTIP) | Current Session | Obtained from Network | 192.168.0.1 |
| %UIPHONEHOME | User Account: Phone (Home) | User Settings | User Manager -> Additional -> Contact Info | string |
| %UIPHONEWORK | User Account: Phone (Work) | User Settings | User Manager -> Additional -> Contact Info | string |
| %UNAME | Account-Name (same as %CLIENTNAME) | Current Session | User Manager -> Login -> Group Name | aaccountname |
| %UQUOTA | Quota: Current Usage | Current Session | User Manager -> Private P2P | Bytes |
| %UQUOTACURRENTGB | Quota: Current Usage | Current Session | User Manager -> Private P2P | GiBytes |
| %UQUOTACURRENTKB | Quota: Current Usage | Current Session | User Manager -> Private P2P | KiBytes |
| %UQUOTACURRENTMB | Quota: Current Usage | Current Session | User Manager -> Private P2P | MiBytes |
| %UQUOTAMAX | Quota: Max Avail | Current Session | User Manager -> Private P2P | Bytes |
| %UQUOTAMAXGB | Quota: Max Avail | Current Session | User Manager -> Private P2P | GiBytes |
| %UQUOTAMAXKB | Quota: Max Avail | Current Session | User Manager -> Private P2P | KiBytes |
| %UQUOTAMAXMB | Quota: Max Avail | Current Session | User Manager -> Private P2P | MiBytes |
| %URATIO | Private P2P: Current Ratio | Current Session | Up/Down | float |
| %URATIOCREDIT | Private P2P: Current Credit | Current Session | Download | Bytes |
| %URATIOCREDITGB | Private P2P: Current Credit | Current Session | Download | GiBytes |
| %URATIOCREDITKB | Private P2P: Current Credit | Current Session | Download | KiBytes |
| %URATIOCREDITMB | Private P2P: Current Credit | Current Session | Download | MiBytes |
| %URATIODOWN | Private P2P: Current Ratio | Current Session | Download | float |
| %URATIOUP | Private P2P: Current Ratio | Current Session | Upload | float |
| %USPEEDLIMIT | Max Allowed Bandwidth | User Account | Up/Down | integer |
| %UTIMEOUT | Current Timeout for User-Account | User Account | N/A | integer |
This HOWTO video shows the process of executing the “reload” command at the command line to reload changes made to the USERS file.
1) BPS currently running as a SERVICE
2) Logging into BPS using “ftp.exe”
3) While the ftp-client is still connected
4) Change the “bpftpserver-users.ini” and edit the password
5) Issue the “bpftpserver -reload” command
6) BPS launches another instance to instruct the current instance to reload the configuration
7) The original ftp-client is still connected
8) Disconnect original ftp-client and try to login as old password (doesn’t work, since it was changed)
9) Try to login as the new password, it works.
426 Connection closed; transfer aborted. Error #10057
During a data-transfer (directory-listings or file-transfers), the control-connection (tcp/ip default 21, used to login and issue commands) is IDLE.
When this control-connection is IDLE, other pieces of networking-equipment between yourself and the ftp-client could choose to close idle connections with a function called “Inactivity Timeout”. This “Inactivity Timeout” can be found in the ftp-client’s first hop to the internet (their wifi/nat router), it could be found in the upstream routers through their ISPs, it can also be found in your own first-hop to the internet. Basically they are everywhere, but the first place is to set this value in your own hardware that provides routing to the internet (example below).
To combat this, the NOOP command (aka Keep-Alive) was made for ftp-clients in the RFC spec. During lengthy transfers, the ftp-client needs to send a NOOP command across the ftp-control-connection; this will keep the connection active with periodic “chatter”.
NOOP command listed in RFC spec of commands:
http://en.wikipedia.org/wiki/List_of_FTP_commands
“Allow Multiple Instances” is a new function as of v2014.1.0.15 that allows you to run multiple copies of the software, each with it’s own set of Settings, Users/Groups. This is very useful for organizations which provide ftp-services for their clients and would like to keep the groups of ftp-users in their own separate instance.
It’s also very useful for controlling bandwidth used by each instances, as multiple IPs can be bound to the computer’s NIC, allowing for fine-grained control of bandwidth, traffic shapping, etc in their networking-hardware; each instance would then use the “Multi-IP” setting to only listen to specific IPs. (Management -> Settings -> Multi-IP)

Sounds super awesome huh?!? But what is it?
I have around 20 virtual-machines, running under VMware Workstation, they allow me to test BulletProof FTP Server for Windows under all the different versions, editions and flavors of Windows that now exist. It’s exhausting actually, mostly because I need to perform Windows Updates every few months.
The host for all these virtual-machines, as well as my development, runs on a custom built ASUS Rampage III with Intel Core i7 970 with 6/12 physical/logical cores, 24 GB DDR2 RAM, storage is via ARC-1880i in RAID0+1 of 4x Samsung SSD. Why does any of that matter? Because, I’m trying to underscore that it’s a blazing fast computer.
But I noticed some network-speed problems, specially under Windows 2008 R1 and R2. Part of the issue was that “vmware tools” on the machines were not updated (do this asap, it will run much better), but Windows Update was taking almost an hour; just to see if there were updates. I dig some digging and found a bunch of articles, linked below. If you are having network-performance issues, please look to see if you are affected by this feature…
NOTE: TCP Chimney Offload does not appear to be a feature that is unique to Windows 2008, as I’ve found it set to “automatic” in default installs of Windows 7, 8, Server 2008; “disabled” in Vista.
HOWTO: Is the MAGIC on?
c:\] netsh int tcp show global

Querying active state...
TCP Global Parameters
----------------------------------------------
Receive-Side Scaling State : enabled
Chimney Offload State : automatic
NetDMA State : enabled
Direct Cache Acess (DCA) : disabled
Receive Window Auto-Tuning Level : normal
Add-On Congestion Control Provider : none
ECN Capability : disabled
RFC 1323 Timestamps : disabled
** The above autotuninglevel setting is the result of Windows Scaling heuristics
overriding any local/policy configuration on at least one profile.
HOWTO: Turn Off the MAGIC
c:\] netsh interface tcp set global rss=disabled chimney=disabled autotuninglevel=disabled

Ok.
Information about the TCP Chimney Offload, Receive Side Scaling, and Network Direct Memory Access features in Windows Server 2008
http://support.microsoft.com/kb/951037
Poor network performance on Windows 2008 Server virtual machine (1009517)
http://kb.vmware.com/selfservice/microsites/search.do?language=en_US&cmd=displayKC&externalId=1009517
Windows Server 2008 R2 Windows updates very slow download time
http://social.technet.microsoft.com/Forums/windowsserver/en-US/ca80c34c-a4e5-4027-880a-9646aa80b352/windows-server-2008-r2-windows-updates-very-slow-download-time
NETSH to disable advanced features
http://social.technet.microsoft.com/Forums/exchange/en-US/968afa2d-e326-49f2-b6a8-1f264e82beea/netsh-to-disable-advanced-features?forum=exchange2010
The effect of TCP Chimney offload on viewing network traffic
http://blogs.technet.com/b/networking/archive/2008/11/14/the-effect-of-tcp-chimney-offload-on-viewing-network-traffic.aspx
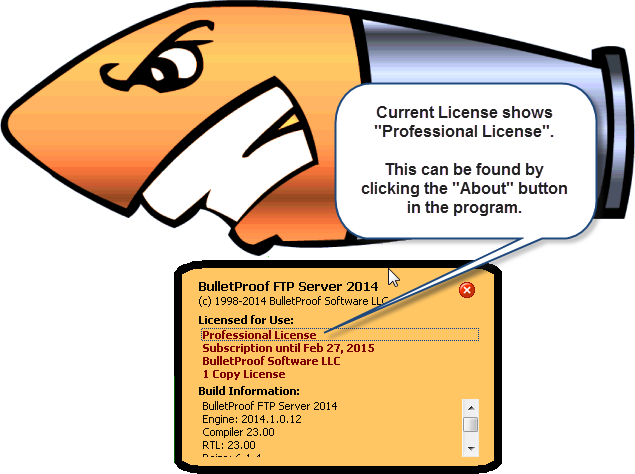
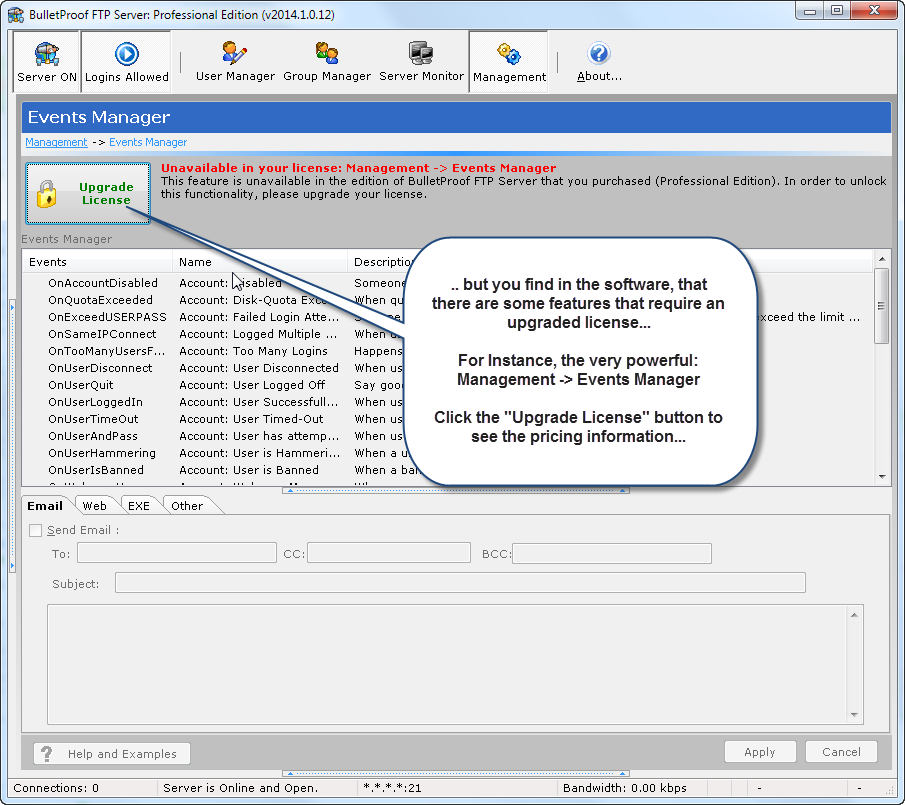
BulletProof FTP Server is licensed via different Editions and include unique features.
As an example, while using the software you encounter a feature that isn’t available in your current license. You purchased the “Professional Edition”, but you recently discovered the very powerful “Management -> Events Manager”, and you’d like to email someone whenever a file is uploaded.
No problem! We’ve built the software to allow upgrading your license and we’ll apply 100% of your original purchase towards the upgrade! This allows you the flexibility to scale up, at anytime, without a penalty!


902djlx0qojsKNOWN PROBLEM: Slow Startup after Several Weeks of Heavy Usage
In order to provide information on Server Monitor -> Files Uploaded/Downloaded, the software writes entries into secondary files stored in the Storage-Location directory. These files contain one-line per file uploaded/downloaded and as the usage of the program increases, these files get bigger and bigger. Start-Up of the program will be effected as these files increase in size and the time to load the file into memory increases (and the footprint in memory increases).
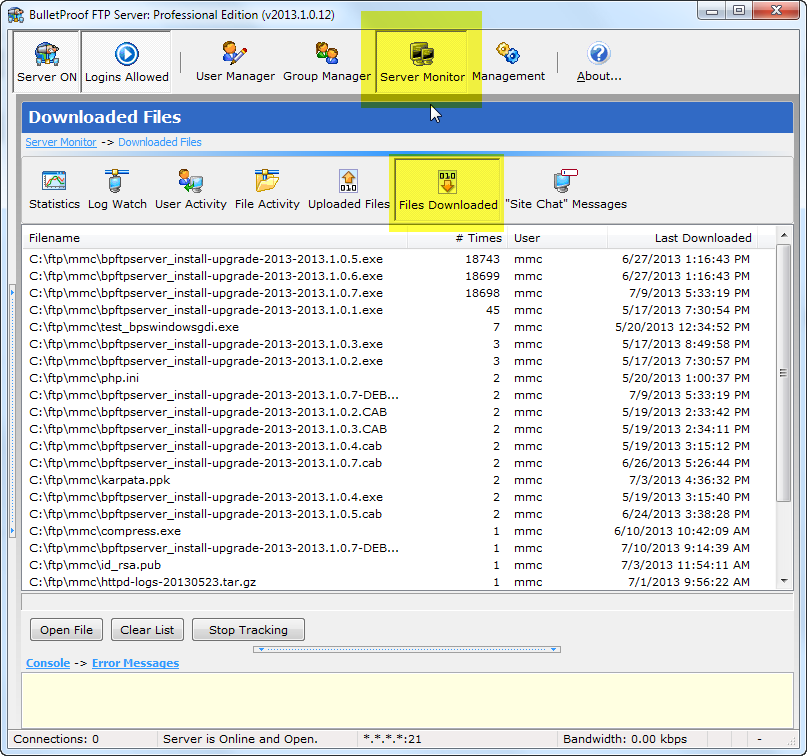
To resolve this problem, it’s necessary to manually archive these files to another location; this will “reset” the statistics found in Server Monitor -> Files Uploaded/Downloaded.
You can manually archive these files:
1) Closing BulletProof FTP Server and ensure the SERVICE is not current running/active
2) Use My Computer or a Command-Prompt and navigate to the Storage-Location.
3) Locate the files named below and move them to some archive directory of your choosing (or delete them):
bpftpserver-common-downloads.ini

bpftpserver-common-uploads.ini
4) Start BulletProof FTP Server
NOTE: In a later version, this will be resolved with a re-organization and re-write of this function in order to save the information in a way that doesn’t affect performance.